Settings#
Project Settings#
 General#
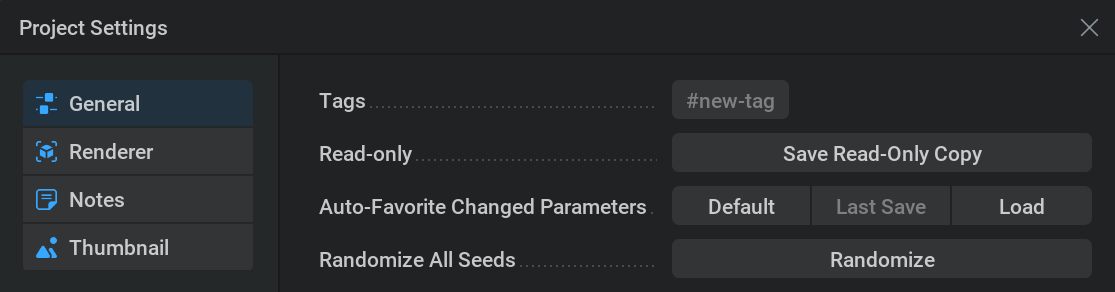
Tags These tags can be used for browsing presets in the presets section of the
 project manager. (presets are .ember files stored in the presets folder in your install directory) You can use the following tags: Fire & Smoke, Fire, Smoke, Explosion, Magic, Particles,8 GB,24 GB
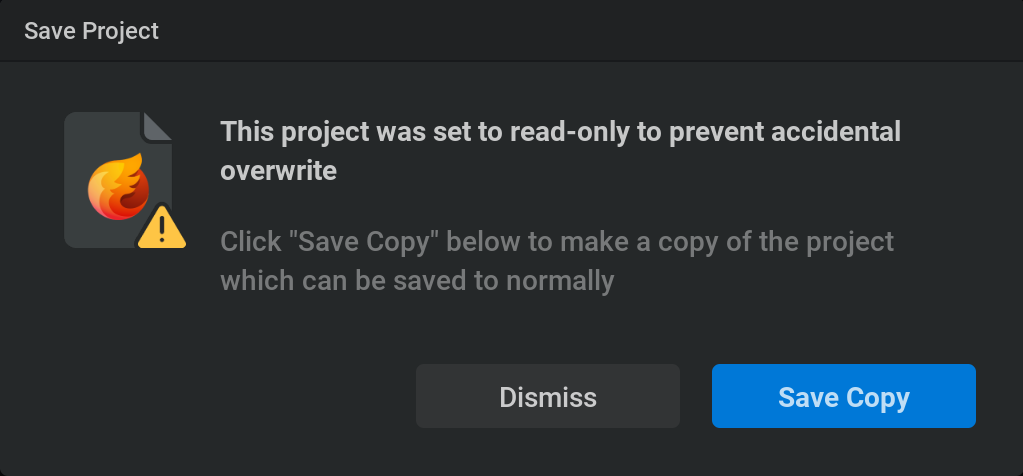
Save Read-Only Copy will open a file browser to specify the name and location of where you want to save your project as a read-only copy.
This project file will function as a normal project file but when trying to save it you’ll be prompted with this message.
Auto-Favorite Changed Parameters: This will favorite all parameters that are changed compared to either the last time you saved your file, the default preset, or another project file which you can browse for using the Load button.
This can be helpful for quickly getting a list of the most important parameters of your project!
Randomize All Seeds The Randomize button will randomize all parameters with
 Randomize Override enabled (by default all Seed parameters). This will give a different variation of your project. For more information about randomization check our Randomization section!
 Renderer#

Search for a setting.
Close Project Settings panel.
Settings category, use the
 icon to open or collapse this category.
Setting
Setting value, all of these can be adjusted.
This will prompt a window to ask you if you want to reset the project settings.
Confirm will reset all the project settings to default.
 Notes#
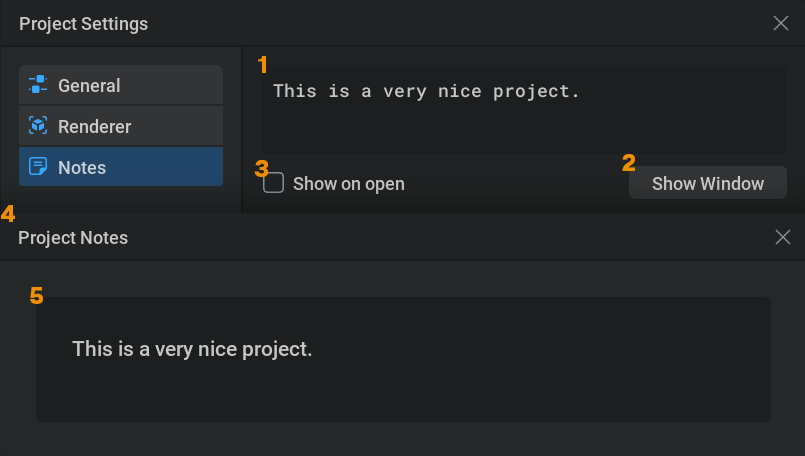
Textfield for typing your note.
This will open the note window (4)
With this checked, the note window will show when opening the project file you’ve set the note in.
Project Notes window
Note text.
 Thumbnail#
A thumbnail is an image or video to show with the preset in the ![]() Home Screen.
Home Screen.
These have to be PNG flipbooks with a maximum size of 4009 pixels in both dimentions.
for more information about flipbooks, please check out our Export section.
When displayed on the Home Screen, a crossfade will be automatically added to the looping point of the thumbnail unless the flipbook is shorter than 41 frames.
Preview Preview of the thumbnail if you have one. You can
 click on the
  and select Clear in the prompt to remove the current thumbnail.
- Capture Here you can select the Render node you want to export the flipbook from in the left dropdown menu and select the capture type you want to export in the right dropdown menu. Note that the capture types only show up if they are mapped in the Capture Types tab of the Render node.
Capture This button will start the capturing of the thumbnail with the specified settings.
Import File When clicking the Import button, a file browser will pop up where you can look for a png file to be used as a flipbook or static image for the thumbnail.
Columns / Rows Here you can setup the amount of columns and rows for your flipbook. The maximum number of frames is defined by multiplying these two numbers.
If columns and rows are set to 1, you will be using a static png as your thumbnail and the following parameters won’t appear.
Frame Count The amount of frames used for the thumbnail.
Frame Rate The number of frames per second used to play the thumbnail. Higher values will “speed up” the video.
Preferences#
General#
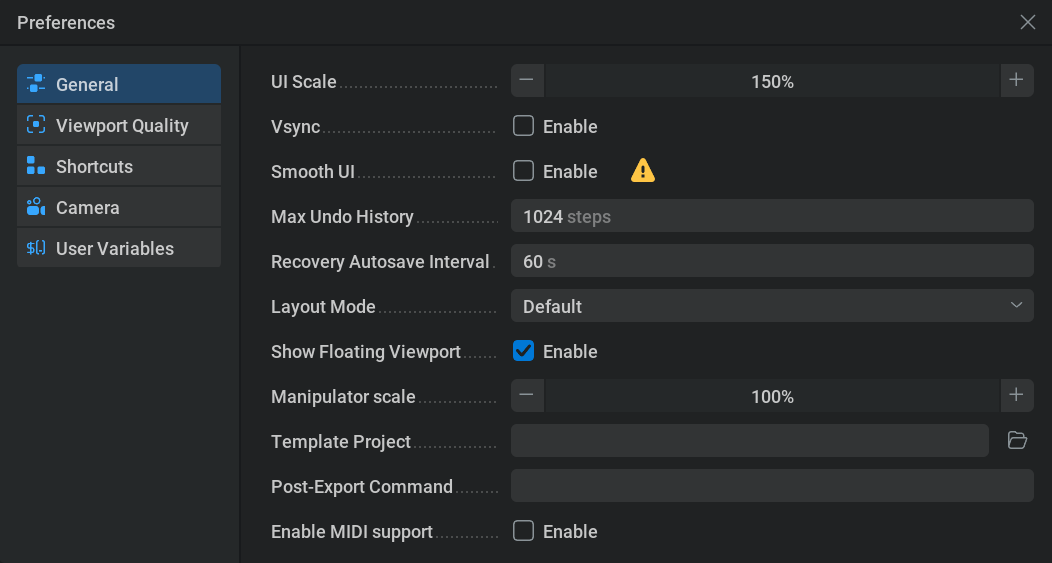
UI Scale: Set a scale for all the text and icons in the UI. This can be helpful when you have trouble reading small letters.
Vsync: Synchronise the UI framerate to the refresh rate of your monitor.
Unlit: Toggle Unlit mode. This mode is used to temporarily minimize the shading to improve performance.
Smooth UI: With this checked the UI will be more responsive. It does slightly lower the performance of the simulation and is currently experimental which can give unexpected problems.
Play Project On Load: If checked, presets will start simulating when opened. Otherwise, presets stay pauses until started.
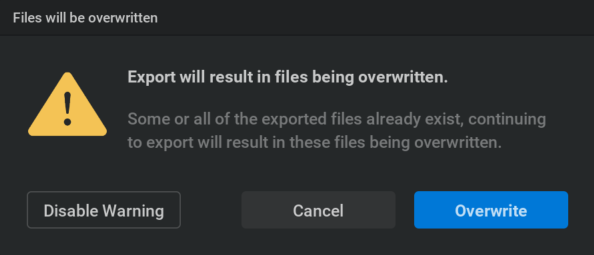
Export Warning On Overwrite: If checked, a warning will pop up when trying to export something that would overwrite something else. for example, if you try to export a flipbook with the same name, extention, and target directory as an already existing flipbook. Disable Warning will uncheck this parameter, Cancel will cancel the export so that no files will be overwritten, and Overwrite will continue the export overwriting the files.
UI Layout Set the layout of the four main panels. This can be useful to quickly reset your layout to the default if you made a lot of changes by moving and scaling these windows.
Graph Background Grid Type: Set the background grid type of the node graph.
Mouse Compatibility Mode: If checked, the hiding and warping of the cursor when interacting with the viewport is disabled. This can be useful with remote desktop.
Middle-Click Emulation: If checked, alt +
is remapped to represent  this can be useful when working on a trackpad.
Scroll-Wheel Emulation: Causes
+ clicking and dragging to act as scroll events when using a tablet like a wacom. This enables you to zoom in and out in the node graph in a similar way to Nuke.Max Undo History: Amount of actions you can roll back using the undo command.
Recovery Autosave Interval: Amount of time that goes by before creating a new recovery autosave file.
Frame Limiter: Maximum framerate of the UI.
Show Floating Viewport: With this checked, you’ll have a floating viewport window when using fullscreen mode
 on another panel.
Create Key When Parameter Exposed: If checked, when settings a parameter to timeline animation, a key will be created with the current value at the current frame.
Show Modulator Output On Timeline: If checked, a preview of the modulator is shown in the timeline. For example, when using a Mod: Oscillator node with a Sine waveform, you can now clearly see how the peaks and valleys relate to the timeline.
Manipulator scale: Scale the Move
 , Rotate
  or Scale
  manipulators in the viewport.
Template Project: Here you can set a custom default project. This project will then be used with File>New Project This project can’t be accidentally saved over since when saving the default project it will act as if it doesn’t have a file name yet and prompt you to specify one.
Post-Export Command: For example, When running an export overnight, you may want to close embergen when the export is finished to save power. This can be done by typing
$quitin this text field.Enable MIDI support: This needs to be checked to be able to use the MIDI node.
Show Minimap: Toggles the minimap in the nodegraph.
Minimap Location: Dropdown menu where you can pick the desired location for the minimap in the nodegraph.
Minimap Scale: Controls the size of the minimap ranging between 40% and 200%.
 Viewport Quality#
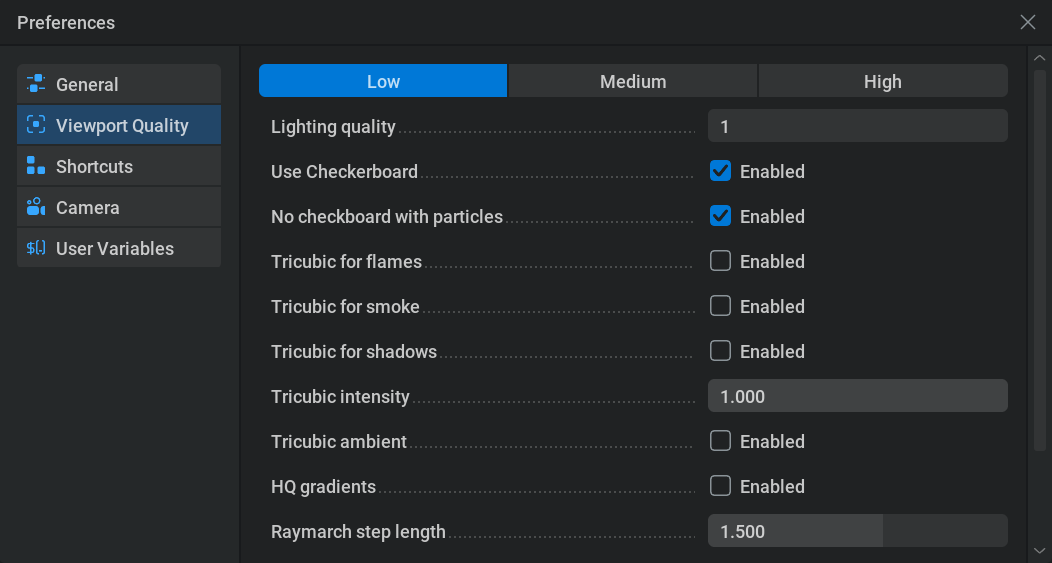
This is where the settings for the three viewport quality options can be adjusted.
 Shortcuts#
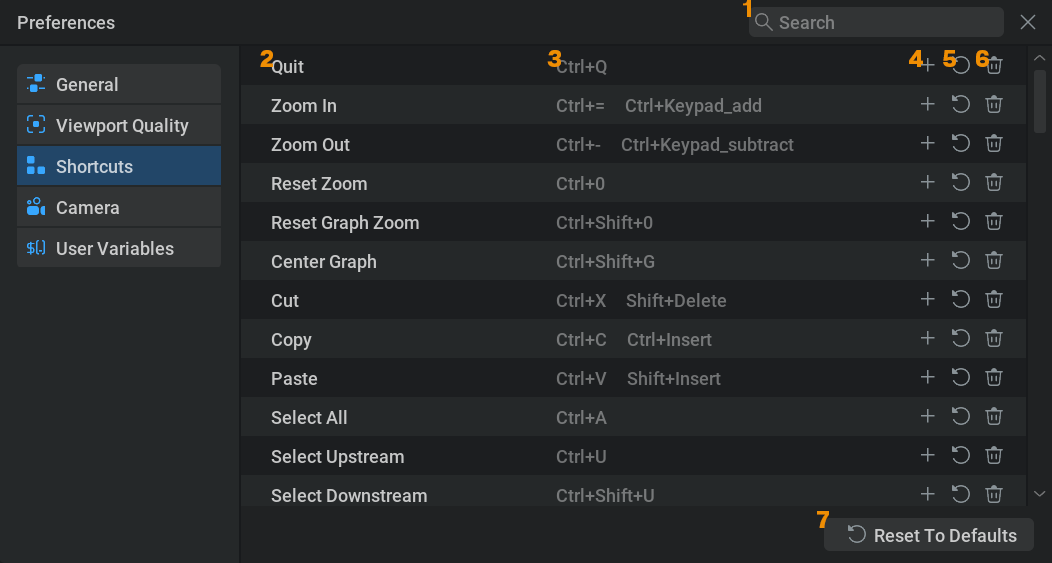
Search for a command.
Command.
Current key-bind.
 Add a shortcut for this command.
 Reset the shortcut to default.
- Remove all shortcuts for this command.
This will prompt a window to ask you if you want the reset all the keyboard shortcuts to the defaults.
 Camera#
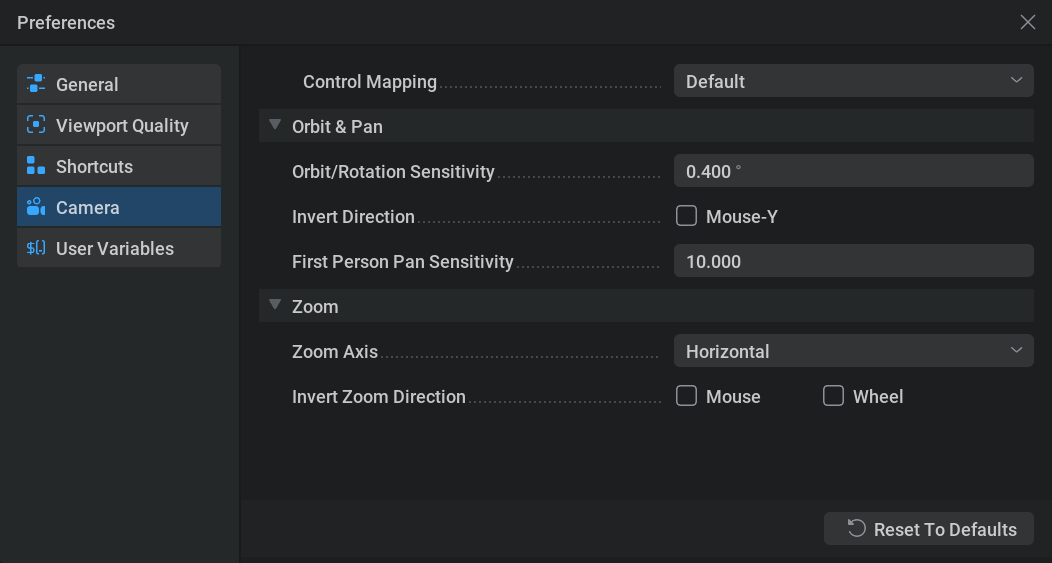
Control Mapping: Dropdown menu of different control mapping types. This is useful when you are used to another type of camera control like Blender or Maya (Industry Compatible).
Orbit/Rotation Sensitivity: Minimal angle in degrees to turn the camera when rotating.
Invert Direction: Checking the Mouse-Y box will invert the controls for vertical orbiting the camera.
Zoom Axis: Zoom moving your mouse either horizontally or vertically.
Invert Zoom Direction: Invert the zoom controls for either the mouse or the scroll wheel.
Reset To Default: Set all the controls in the Camera tab back to default.
 User Variables#
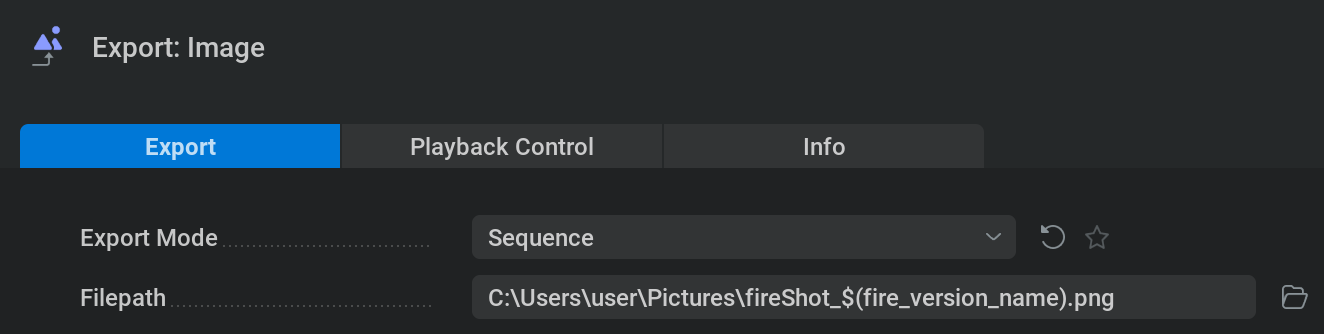
Custom variables can be used in export node file paths to improve your workflow.
For example, if you have a lot of export nodes for separate capture types and you want to change something in the filename for all of them. If all the filenames have a user variable you can just change its value here to change it in all the filenames instead of doing it one by one.
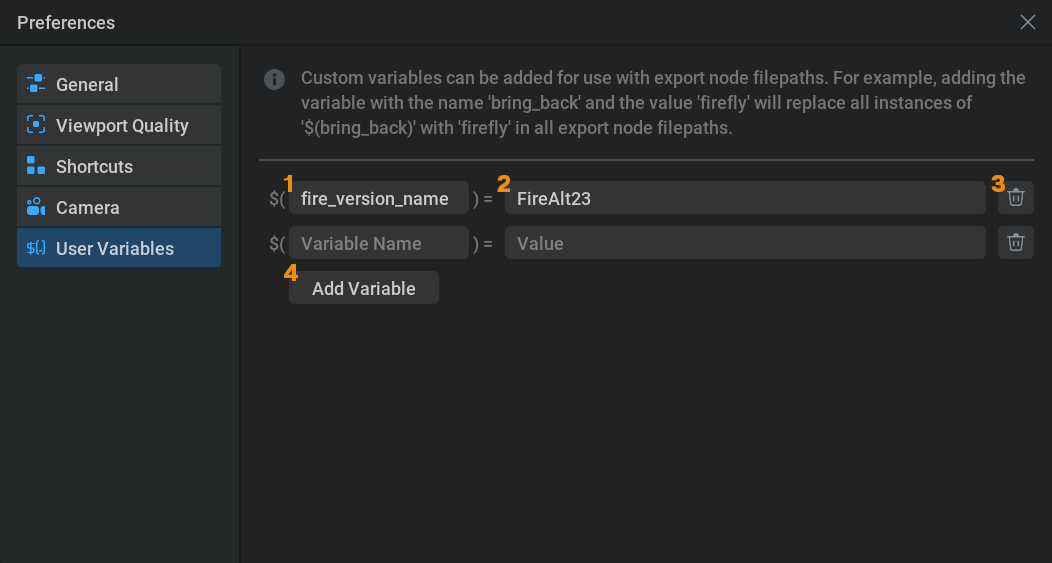
Variable name.
Variable value.
- Remove variable.
Add a new variable.